Virtual AC Croquet Tutor - Guide
Links
Contents
- AC Croquet Tutor Scope
- Scope
- Installing
- Licence Page
- Coin Toss
- Start Page
- Recording a Shot Sequence
- Playback shot Sequence
- The Start
- Aiming
- Shot Strength
- Roquet and Croquet Shots
- Croquet Shot Ratios
- Hoop Scoring
- Hoop Aiming
- Bisques
- Stepping Back
- Restarting the Game
- Ending the game
- Lifts
- Targets
- Jump Shots
- Stop Shots
- Fast/Slow Motion
- Score Correction
- Hoop View and Clip Position Buttons
- Guide, Options and Corrections
- Start Options
- Load/Save Game
- Play Imported Shot Sequences
- Top View Options
- 2- Dimensional Screen Shots
- Acknowledgements
This is a tool for teaching.
This tutor version is designed to make it easy to record a series of strokes which can be saved and played back shot by shot when demonstrating to other players. It can also be used to record videos with voice over. It can be used for demonstrating shots and tactics to players of all levels. The files to which the shots are saved can be emailed to friends/students so they can play them on their game version of the program.
The sequences are saved in .xml files in a folder called ‘AC Croquet Saved Shot Sequences’.
For this, tutor, version there is an option in Options to set the shooting inaccuracy to zero to allow the tutor to set up the shots
easily. If a shot goes wrong it is possible to step back to repeat the shot until it is correct.
It is hoped that a library of demonstrations can be built up and placed in the public domain for others to use. Please send copies of the .xml files to BrookwoodCroquet@gmail.com with a description and they will be added to a library available to all.
The game can be played in exactly the same way as an AC Croquet game as defined by The Croquet Association but using a mouse instead of a mallet. Level or handicap games can be played.
It is assumed that the person using this tutor version of the program is familiar with all aspects of playing Association Croquet. For information on how to play croquet refer to the AC Croquet Game Guide Page at www.brookwoodcroquet.btck.co.uk
Down load the game and ‘run’ the file to load it onto your computer. You may need to double click on the file. The installation process will install a shortcut on your desktop. If you wish you can drag the shortcut icon to the bottom task bar, or to the side tiles(Windows 8-10) on your computer. To run the program double click on the game icon.
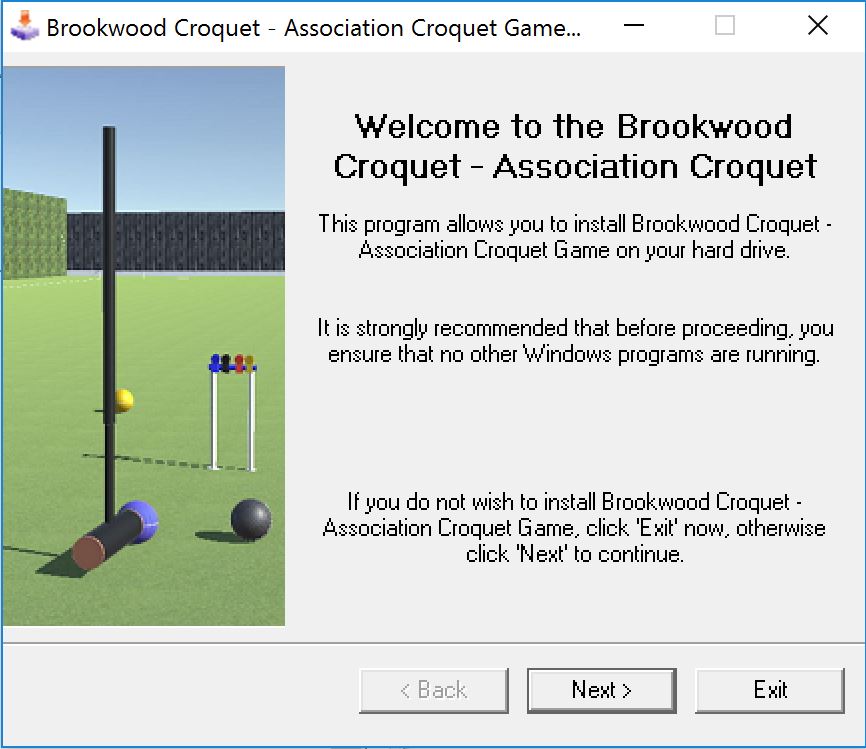
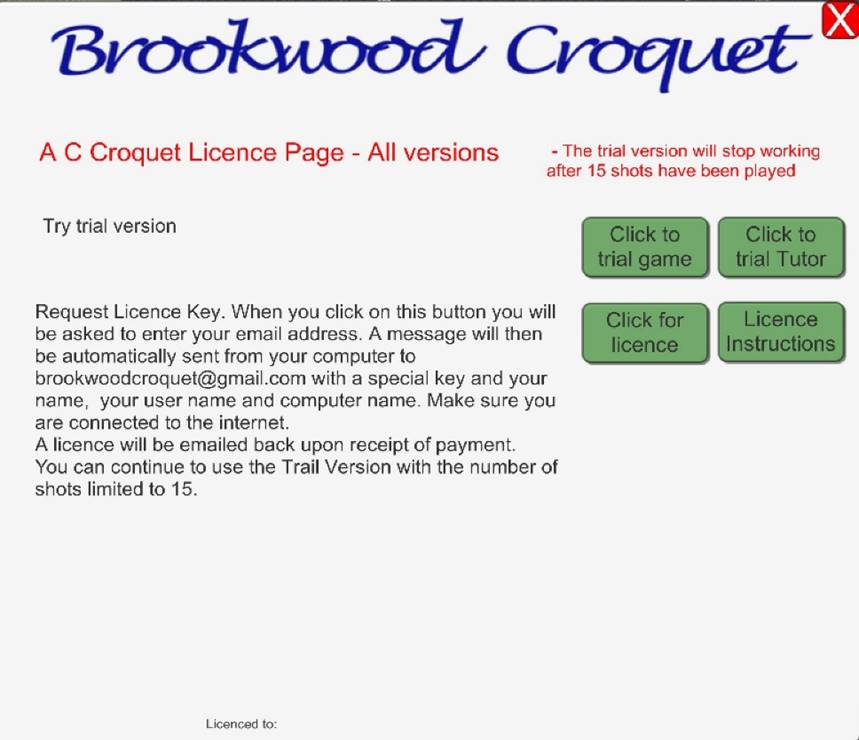
The first screen is a licence screen. This will not show once the licence is complete.
Click on ‘Trial Game‘ or Trial Tutor’ to explore the programs. You can play up to 15 shots before the game stops. If you close and reopen the program you can play another 15 shots. You cannot save games in Trial mode.
If you want to buy a licence, click on the ‘Click for licence’ button. Select the version of the game that you wish to buy. Enter your name and email address twice for ensuring accuracy. If you have received a gift voucher for the game enter the voucher number in addition.
The information to be emailed can be viewed before sending by clicking the ‘View message before sending’ button.
Y clicking the 'Send' button, a 10 character output KEY is sent to Brookwood Croquet.
You should then arrange to make your payment.
To make payment remit the appropriate amount to Brookwood Croquet by internet banking
Bank details
Lloyds Bank A/c no: 31645468 Sort code: 30-90-89
Please indicate the nature of your purchase with the bank entry.
Or, if that is not possible, send a cheque to Brookwood Croquet, Oakbank, Bagshot Road, Brookwood, Surrey GU24 OHH, UK. In either case please complete the payment details on the screen so that we have your full contact details and can anticipate the payment. A receipt will be emailed back to you upon receipt of payment.
Once payment is received a 10 character key will be emailed back for you to enter. For details of the licence process click on the ’ Licence Instructions’ button. You can continue with the demo version meanwhile, closing and opening the program as desired.
It is possible to virtually toss a coin to chose the starter. Go to the Options tag on the left hand side and click on ‘Toss Coin’.
A silver coin will appear just to the left of the centre of the screen and after a few seconds it will start to spin upwards before landing on the ground.
The next screen is the opening menu offering a number of choices.
To begin with just click on the Start button.

On the left hand side you will see a ‘Record' tab. Click on that and it will open the ‘Save Shot Sequence Form’.
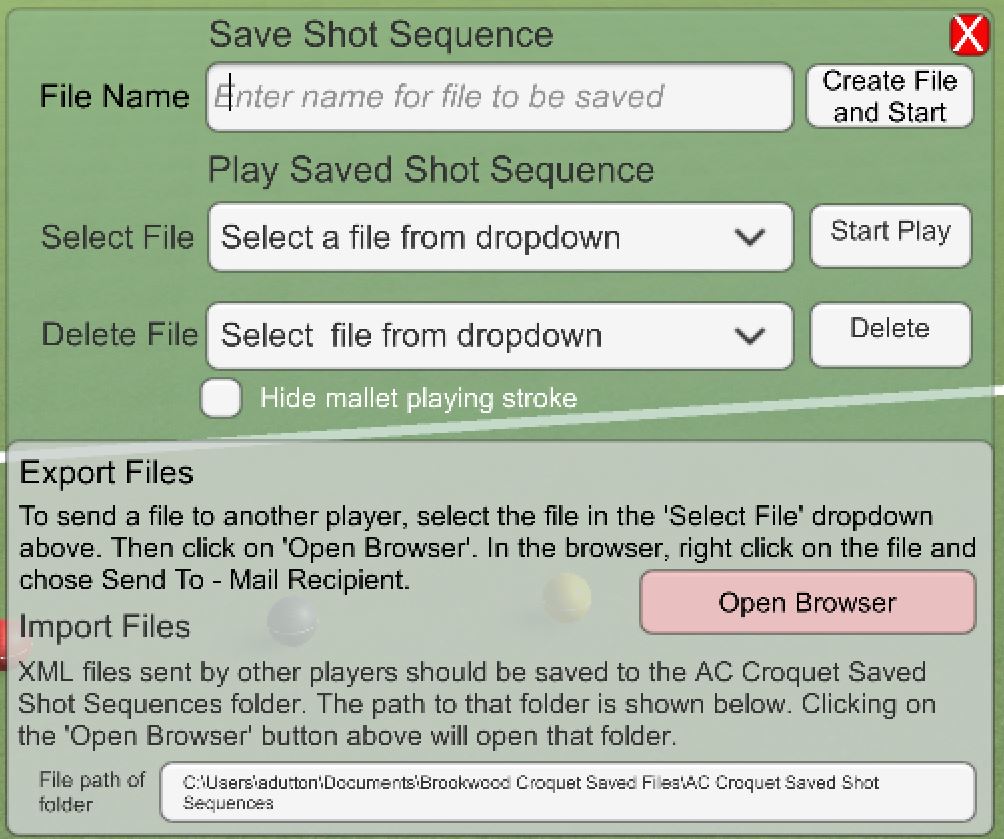
If you wish to start recording a new set of shots, enter a file name in the first input box and click on ‘Create File and Start’. A file of that name will be created and saved and a new form showing ‘Recording’ will appear.
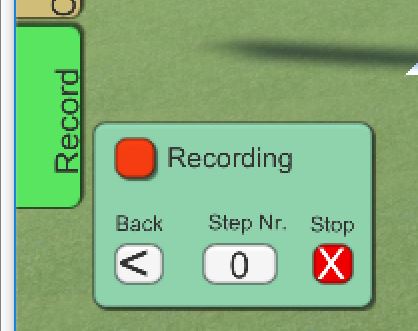
You can then start to play the shots. As you do the ‘Shot Nr’will increase by one for each shot. Each shot is saved at the commencement of the next shot.
If you are not satisfied with a particular shot and wish to play it again click on the ‘Back’ ‘<’ button.
When you have finished the sequence of shots click on the ‘Stop’ button to record the last shot and to close the ‘Recording’ form
Click on the ‘ Record’ tab again and the ‘Save Shot Sequence’ form will appear again.
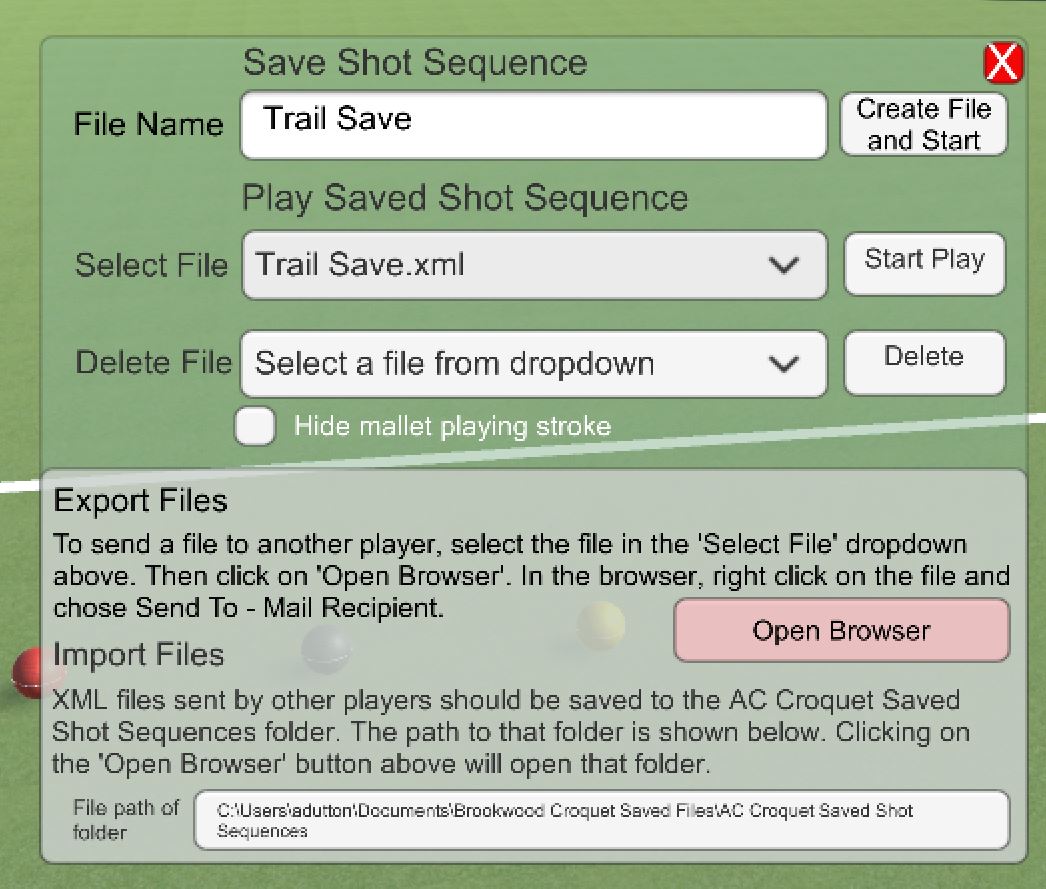
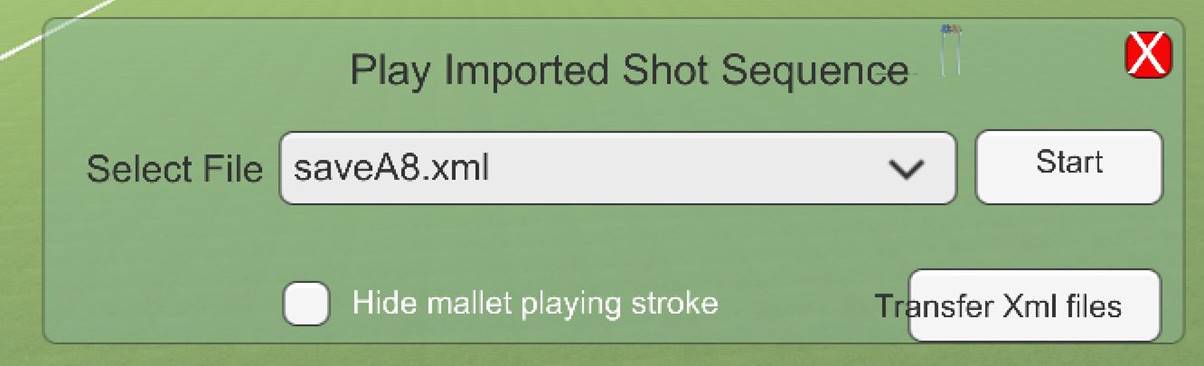
Click on the drop down arrow of the ‘Select File’ input and select one of the files. Click on ‘Start’.
A new form called ‘Replay Sequence’ will appear with the file name in the first box.

Click on the forward and back buttons to play each shot. When a shot is played the mallet will appear briefly but not play the full swing. You can hide the mallet by clicking on the ‘Hide mallet playing stroke’ checkbox on the ‘Save Shot Sequence’ form.
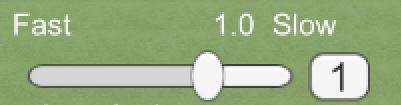
Messages will appear in the bottom box. For example you will be warned to wait until the balls have stopped moving before playing the next shot. You can speed up the playing process by increasing the ‘Fast/ Slow Motion’ value above 1.0.
When you reach the end of the sequence you will be advised and, if you continue, the sequence will start again.
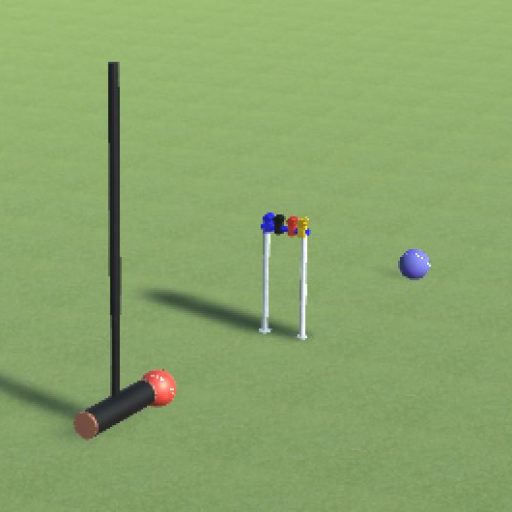
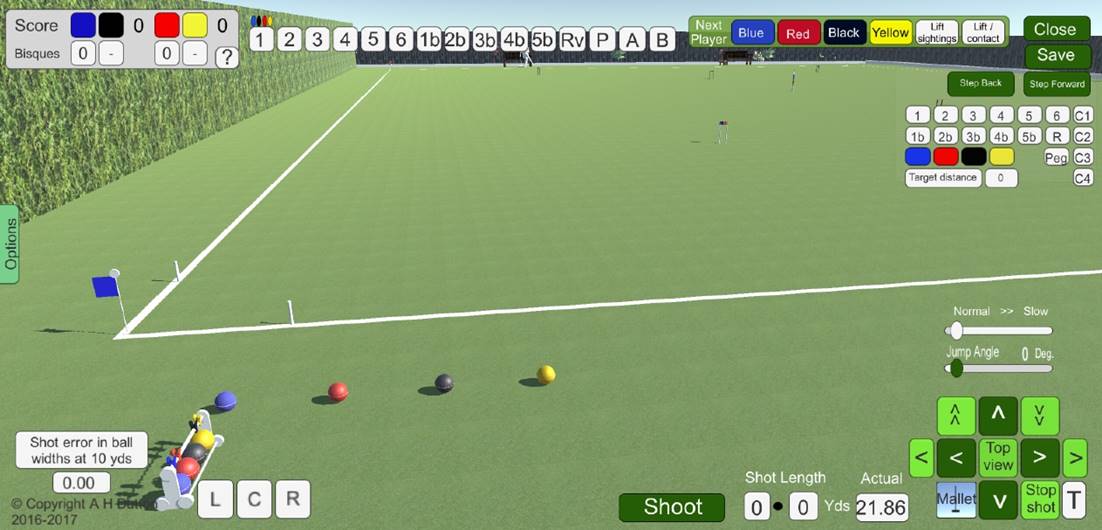
The Main Screen
You will see the four balls lying outside the south boundary. For reference, there is hedge on the west boundary side and a fence on the east boundary side and the north boundary
It is possible to virtually toss a coin to chose the starter. Go to the Options tag on the left hand side and click on ‘Toss Coin’.
A silver coin will appear just to the left of the centre of the screen and after a few seconds it will start to spin upwards before landing on the ground.
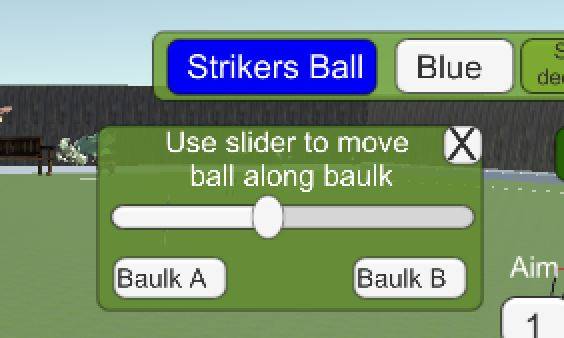
Chose the ball colour to start and click on the colour button at the top of the screen. A panel will appear asking you which baulk to start from. Select the A or B baulk and use the slider to position the ball along the baulk. Sliding to the right will move the ball to the half way point. Sliding to the left will move the ball to Corner 1
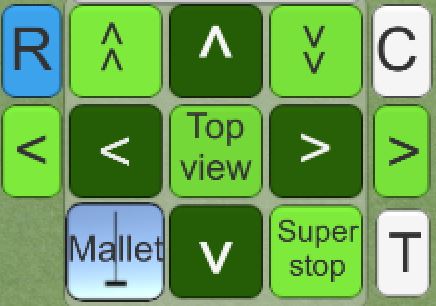
Aim the ball by clicking on the dark green left and right arrow buttons. Holding down the button will allow continuous movement. You can raise and lower the viewpoint by clicking the up and down dark green buttons. By aligning the top of the mallet handle with the target it is possible to be very accurate. Once aligned, click on the mallet button. Sometimes you may need to click this twice.
Now choose the shot strength. There are two ways to do this which can be selected from the options tab on the left hand side of the screen. The ’Toggle Keypad’ button at the bottom of the options menu toggles between the to methods.
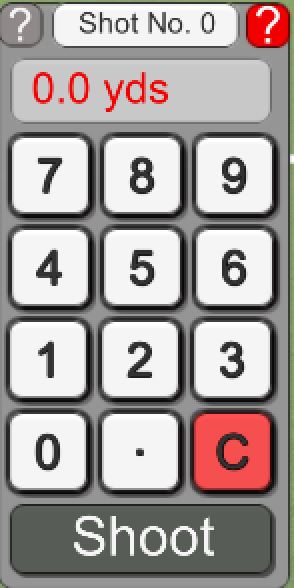
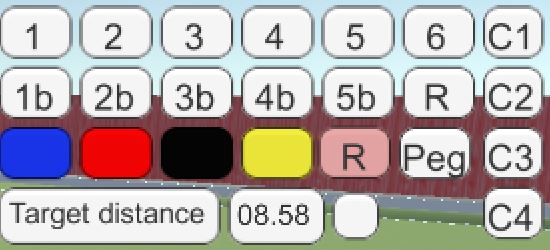
The default option is a Keypad where the shot length can be entered like using a calculator. All distances are in yards and decimal yards. The position of the keypad can be moved around the screen by clicking and dragging as desired.
The second option is to enter the shot strength by clicking and using the mouse scroll wheel. Left clicking in the first white box will increase the strength by 10 yards at a time and right clicking will lower the strength. Using the scroll wheel will increase or decrease the strength by 1 yard at a time. The second box can be used for decimal parts of a yard.
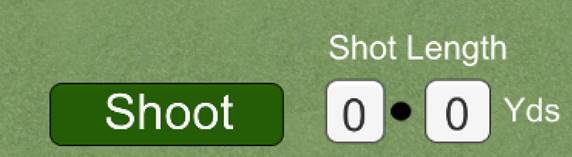
Once the shot strength has been selected, click on the ‘Shoot’ button and watch the mallet hit the ball. The accuracy and the distance of the shot is automatically varied based upon a set of random numbers which generate a Gaussian distribution to closely represent reality. On the start screen it is possible to select three classes of accuracy. The C class is twice as inaccurate as the A class.
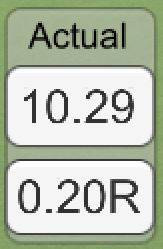
The actual shot length and direction accuracy of the shot just played is displayed on the left hand side of the screen. The top number is the actual played shot length. The lower number in the box indicates the number of ball diameters at 10 yards by which the ball is off line. The letter L or R indicates if the inaccuracy was to the left or the right.
 The ‘C’ button, when hovered over, will give a local top view on the croquet alignment when the mallet is present.
 If you wish to see the position of the ball on the lawn from above either click on ‘top view’ or hover the mouse over the ‘T’ button. If the mallet is positioned next to the ball the line of the shot will be highlighted.
Unless a hoop is scored, once the first ball has come to a stop, ‘Next Player’ is registered and the next ball colour will be made available at the top of the screen. That ball colour can be played in a similar way to wherever the player chooses.
If one ball hits another, the ball that is hit is said to be roqueted (pronounced ‘rokayed’). When this occurs, a new set of buttons appears to allow the croquet process to be followed.
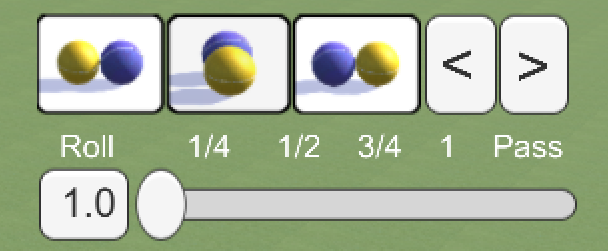
When these buttons are clicked, the player’s ball( known as the striker’s ball) will be placed to the left side, in line or to the right side of the roqueted ball. By clicking on the white background left and right arrows the alignment can be changed to point the roqueted ball in any chosen direction. The roqueted ball will travel approximately in the direction of a line passing through the centres of both balls.
The next shot is the croquet shot where the striker’s ball is struck so that both balls move. Croquet shots can be straight drives or rolls. As the strength of the roll increases the striker’s ball will travel further until as an ‘equal roll ’it will travel the same distance as the roqueted ball, now called the croqueted ball. Adjust the slider to achieve the desired roll. A figure of 10 is an equal roll. A figure of 5 is a half roll. A figure if 13 will give a pass roll. These figures are for in-line shots. As the direction of the shot splits the ratios will change. The shot strength needs to be the approximate sum of the two travel distances. Practice will be required to master the distances on croquet shots just as is required on the croquet lawn.
Once the roll type and shot strength have been selected cick the mallet button again to reset the mallet angled as appropriate for the roll.and play the shot. It will be noted that on occassions the balls ‘pull’ just as they do on the real game and sometimes the back ball jumps a little.
Folowing the completion of the croquet shot the striker is entitled to a continuation shot. If in that shot another ball is roqueted the sequence starts again.
The ratio for rolls may vary slightly depending upon the speed of the computer being used. It is possible to adjust the ratio within certain bounds by using a slider shown. This can be displayed by clicking a button under the Corrections Tab. It is recommended that you adjust this such that an equal roll with a narrow split of 20 yds strength gives equal distance to both balls. 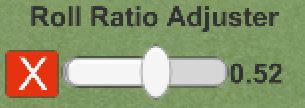
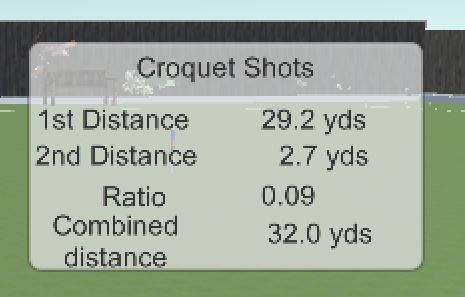
As an optional aid, if the pink ‘R’ button in the Aim Group is clicked.
A new panel is shown which will calculate the shot ratio and the combined shot strength. Once the panel is showing click on the target button for the roqueted ball and then click on the target button for the strikers ball.The ratio and combined shot strength will be shown. If the order is wrong or you want to try a different target then click the pink ‘R’ button twice to reset the table. While the ratio panel is visible the sight line will not change when the aim/target buttons are clicked.
Note that the distances to the targets are go right up to the target so adjustment may be needed to deliver a ball to a suitable distance in front of the hoop.
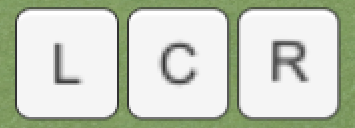
It can be difficult to accurately align the shot for running a hoop. To assist, the LCR buttons give low down views along the left hand side, the centre and the right hand side of the ball respectively. By clicking on the L or Rbuttons the shot angle can be adjusted whilst the view is retained.
For tablets the LCR buttons are different to allow for touching.
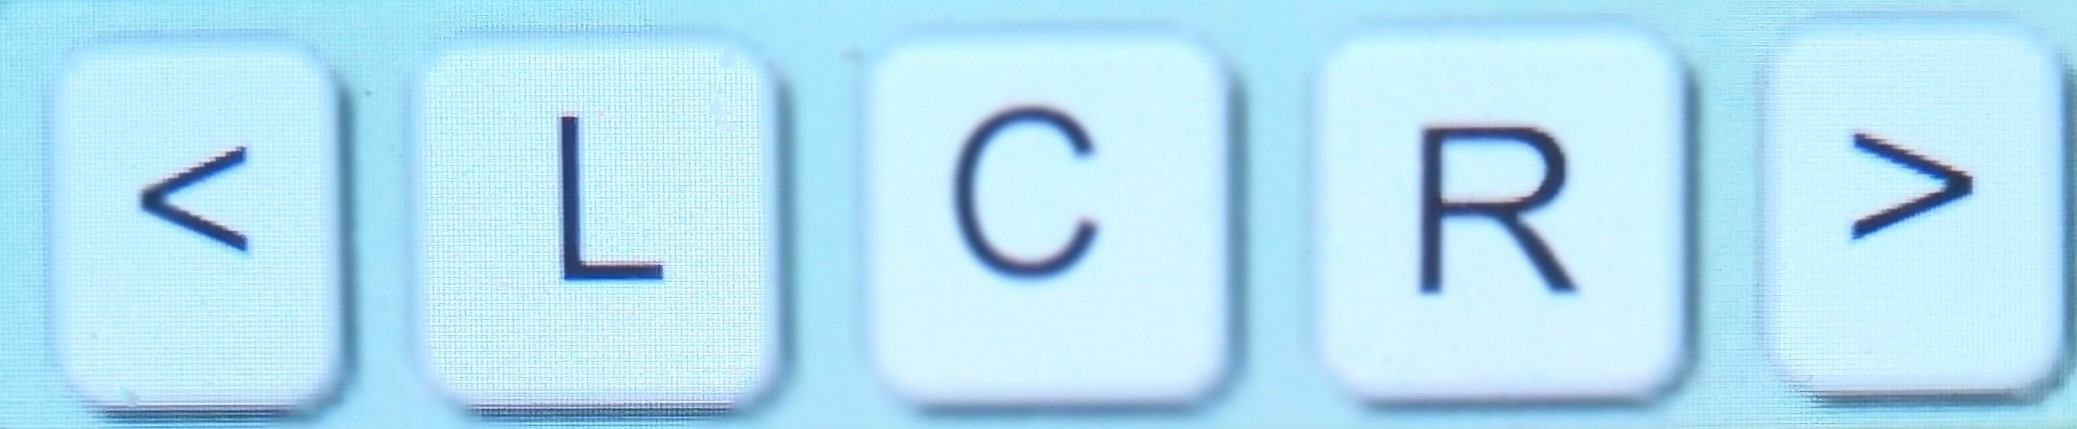
Touching L and R will show the views. Touching the arrow buttons at the same time will start the rotation fast and just touching the screen anywhere with a second finger whilst touching the L or R button will start the rotation slowly.
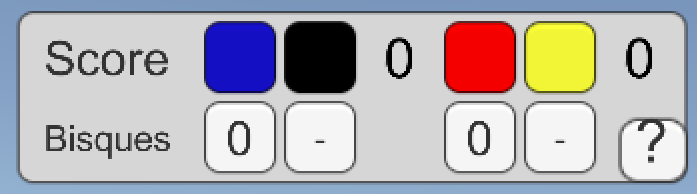
In the handicap version of the game, players are awarded ‘Bisques’ . These are free turns which can be used with the ball just played. These can be allocated by selecting Handicap in the starter screen and scrolling the number of bisques awarded. To use a bisque click on the bisque number in the top left hand corner and available ball colur will reappear at the top of the screen. Select the ball colour made available and play the shot desired. It may be necessary to click the bisque number twice to activate the change in ball colour.
Sometimes half bisques are awarded. Half bisques cannot be used to score a point(run a a hoop).

The step back to replay button can be used when an error is committed to reposition the balls to their pre- shot positions. Cancel step back will return them to their previous played position. Stepping back can also be used to practice shots. However, it should be noted that occasionally repeated stepping back or forwards might lead to errors in the clip positions and possibly the score. There are ways to correct these discussed later.
By clicking on the restart button, the balls, bisques, score and clip positions will return to the starting point whilst the game parameters are retained.

To exit the program click on the ‘Close’ button a the top right hand of the screen and then select ‘yes’ on the pop up panel.
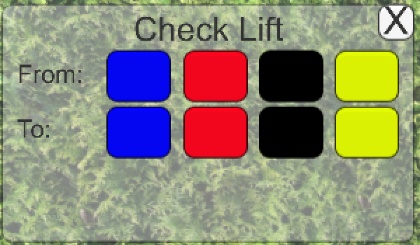
Where there is a possibility of a lift due to an obstruction use the Liftsightings button to call for the lift check panel. Click on from and to colours to see view along the line of the two balls. Then click on the left or right buttons so see the view along the left or right sides of the ball. If there is a clash with a hoop, the computer will sound a bell..
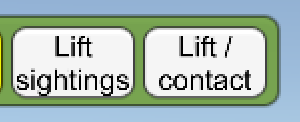
The Lift/contact button is for Advanced Game lifts to baulk. Follow the instructions as they are shown on the screen.
To make it quicker to align the balls, if one of the target buttons is clicked the view will be aligned directly from the striker’s ball where it lies and the target. In addition, the target distance from the striker’s ball to the target is shown in the white box.

It is possible to do a jump shot by adjusting the mallet angle with the slider. Note that the ball will only jump with a shot strength of over about 10 yards just as is the case on the lawn.
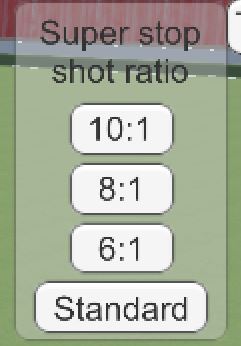
The minimum roll ratio determines the stop shot ratio and it is between 5 and 6. For certain shots it may be desired to have a higher stop shot ratio. If the 'Super stop' button is clicked, once the balls are together for the croquet stroke, options for higher ratios are displayed near the croquet group. The ratio will revert to the standard ratio for the next croquet shot.
It may be preferred to play the game with the balls moving faster. The slider can be used to speed up play. Sometimes you may see the slider move during a shot. This is to ensure the correct behaviour of the balls. The speed will return to the previous value at the end of the shot.
It may also be of interest to play angled hoop shots in slow motion to see the ball ricochets. Use the slow motion slider and if a side view is preferred click the pale green side movement buttons to adjust the view while leaving the shot in line.
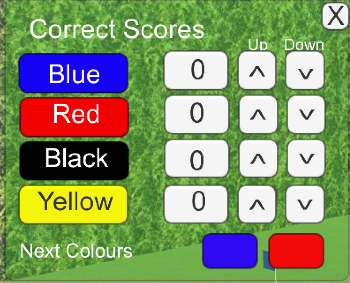
By clicking the question mark on the score panel, or selecting ‘score correction’ from the Corrections tab, it will be possible to correct any error in the score or clip position. Such errors occur rarely.
Hoop View, Side View and Clip Position Buttons

These buttons show the clip positions along the top making it easier to read the status of the game. By hovering over the buttons with the mouse a close up view of the hoop is shown.
Some times it is desirable to see the side view of a hoop to check if a ball has run its hoop. By clicking on the 'Hoop Side View' toggle under the options, you can then see the side view of the hoop when hovering over the above buttons.
Buttons A and B give the view from the baulk. Use the slider to view from different positions along the baulk.
Guide, Options and Corrections

On the left hand side of the screen are tabs labelled Guide, Options and Corrections. These tabs will toggle on and off, the Guide and lists of Options and Corrections
Guide
This will open a web page showing the guide. Clicking on the items in the contents list at the top will jump to that section.
Adjust the width of the web page to suit by dragging the boundary.
Clicking into the game will hide the web page or click ‘Guide’ again.
Options
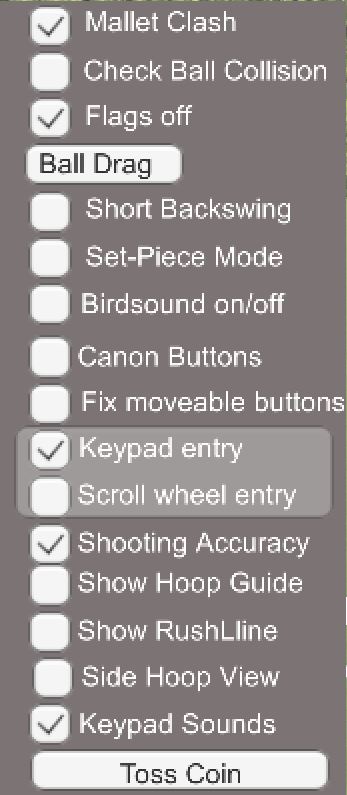
Mallet Clash: The program automatically prevents the postioning of a mallet where it would clash with a hoop or another ball. By turning this toggle off, it is possible to place the mallet in a hampered position.
Check Ball Collision: If ticked, a message in the bottom left hand corner will confirm if a ball/ ball impact has occurred.
Flags Off: Will hide the flags and corner pegs if they obstruct a shot.
Ball Drag: This button will open up the top view where balls can be dragged and spotted to position once the 'Drag Ball' toggle is ticked. This may be necessary with a corner cannon. Dragging a ball, apart from to position it around another ball is not permitted in the game. However, it may be useful during practice.
Short Backswing: Reduces backswing to 30% of normal backswing.
Set Piece Mode: With this switched on at the start of a game any ball can be chosen to make it easier to set up ball configurations for practice.
Turn Bird Sound off: Turns background bird sound on or off.
Canon buttons: Use to help set up three ball canons. Balls can be placed adjacent and rotated around.
Shot Length: Adjust the shot length accuracy as preferred.
Fix moveable buttons: Various groups of buttons can be repositioned on the screen by click and drag.
Keypad/Scroll Wheel: Select one or the other to switch between the keypad or scroll wheel for entering shot strength.
Shooting Accuracy: Turns shooting accuracy on and off to allow perfect accuracy when recording shot sequences.
Show Hoop Guide: When ticked a pink guide will appear when using the LCR buttons to check on hoop alignment
Show Rush Line: When ticked, the rush line will show when the cursor is over the blue 'R' button near the mallet button.
Hoop Side View: When ticked, the side view of the hoop will be shown when hovering over the hoop buttons at the top of the screen
Coin Toss: Click button to toss a coin to choose who starts.
Corrections
Make Handicap Game: Another way of showing the bisque form for entering bisques.
Correct Score: If clicked, a panel appears allowing the score to be corrected.
Correct Strikers Colour: If the program incorrectly indicates that it is the next players turn this will correct the fault.
Yardline: Occasionally a ball may not be moved to the yard line when it should.Clicking this button will move balls which are not in-hand or hoop run balls to the yard line.
Clear Croquet Status: Occasionally the croquet system may get out of sequence. Use this button to stop the croquet sequence.
Stop all movement: Very occasionally the view might start to spin.This should stop it.
Show Target Buttons: On occassions the target ball colour buttons may appear white and not function. Clicking this button will make them active again.
Set hoops upright: Occasionally a vey hard shot close toa hoop may knock the hoop to an inclined position where it remains. This button will return the hoop to the upright position.
Show Keypad: Occasionally the keypad may disappear. This button will reinstate it.
Reinstate Lawn View: Occasionally dragging the screen may move away from the court. Clicking this button will reinstate a view showing the lawn.
Adjust Roll Ratio: A slider will appear close to the keypad allowing the roll ratio to be adjusted to suit the speed of the computer
Accuracy Factor: Change value to allow the shooting accuracy to be changed. The value of 1 maintains the inaccuracy set by the A B or C class on the start page. With the value set at 0.0 there will be no inaccuracy. A value of 2.0 would double the inaccuracy.
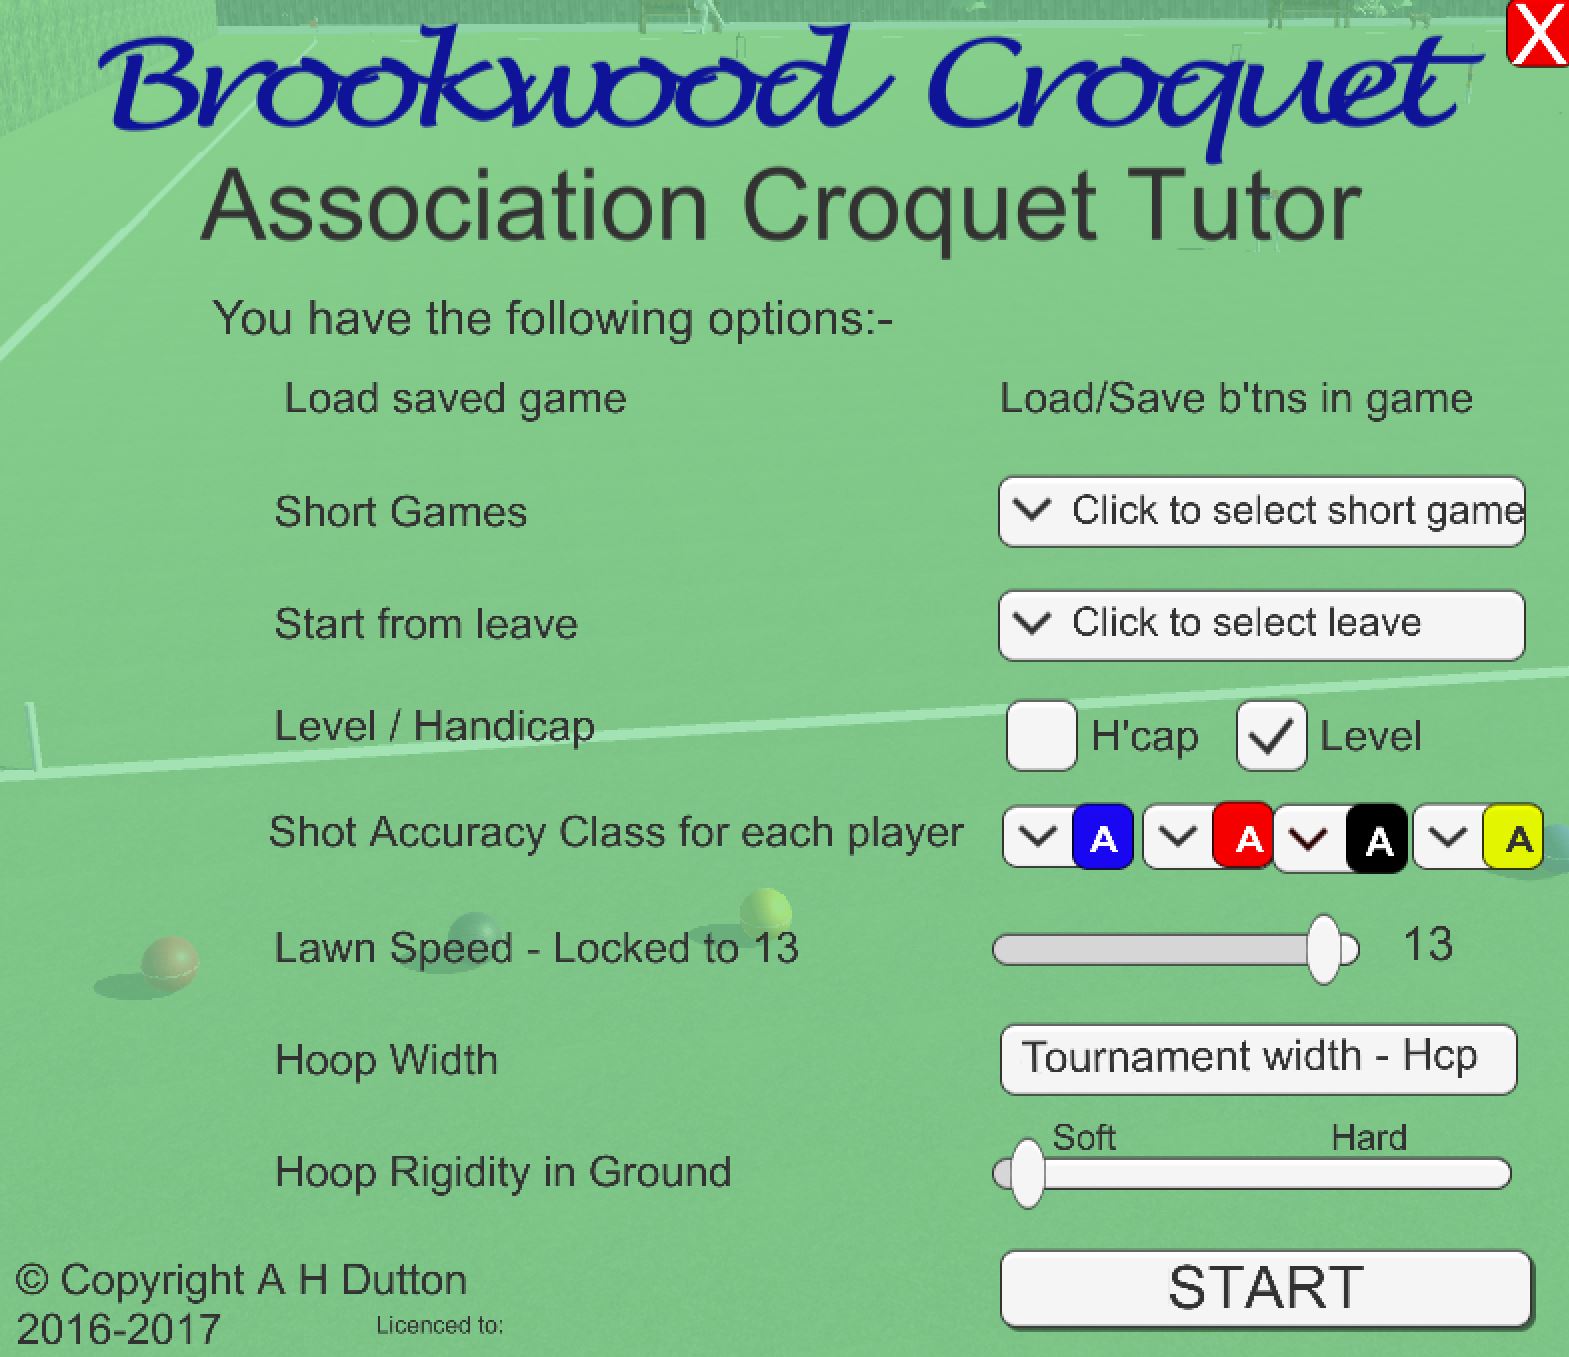
The start screen offers the following options:
Select Previous Game: This is now carried out using the Save and Load buttons within the game.
Short Games: 18pt, 14pt and 1-Ball - 13 point and 1-Ball - 7 point games can be selected.
Start from leave: For practice, a number of standard 1-back and 4-back leaves can be selected.
Level/Handicap: Click to select a handicapgame.
Shot Accuracy Class: Select shooting accuracy for each player. Class B is 1.5 times more inaccurate then Class A and Class C is twice as inaccurate as Class A.
Adjust Lawn Speed: Currently not operating.
Hoop Width: Hoop widths can be set from Garden to Championship.
Hoop Rigidity in Ground: Currently not operating.

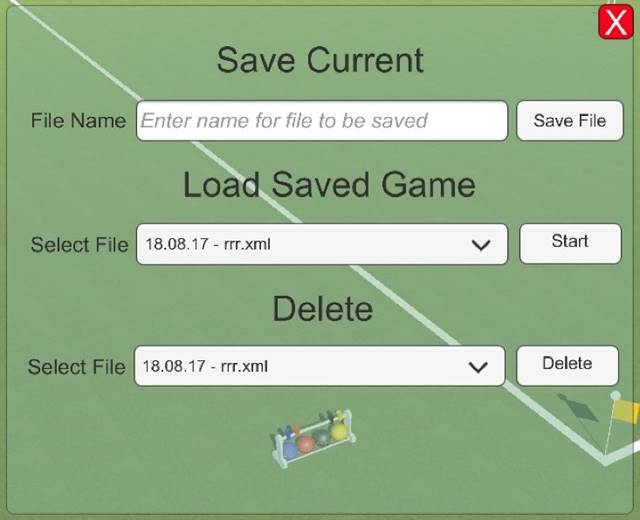
By clicking on the Load/Save button a new window is exposed which gives options:-
- Save the current game by entering a game description in the first box and clicking the save button. The date is added to the description to allow multiple saves of a game.
- Load a previously saved game by selecting one from the first drop down box.
- Delete a redundant game by selecting it in the second drop down box.
For PCs, files are saved in a directory created in your Documents folder
Documents\Brookwood Croquet Saved Games\AC Croquet Saved Games
For Macs they are saved in a folder located withins the program folder.
In the tutor version of the game it is possible to record shot sequences to demonstrate parts of the game. It is intended that a library of such sequences will be built up so that so that they can be down loaded and played by interested users
Downloaded files should be saved to the Documents\Brookwood Croquet SavedShot Sequences\AC Croquet Saved Games folder. It may be necessary to create the folder.
The tab on the left hand side will open a form and the drop down on the form will list the available files.
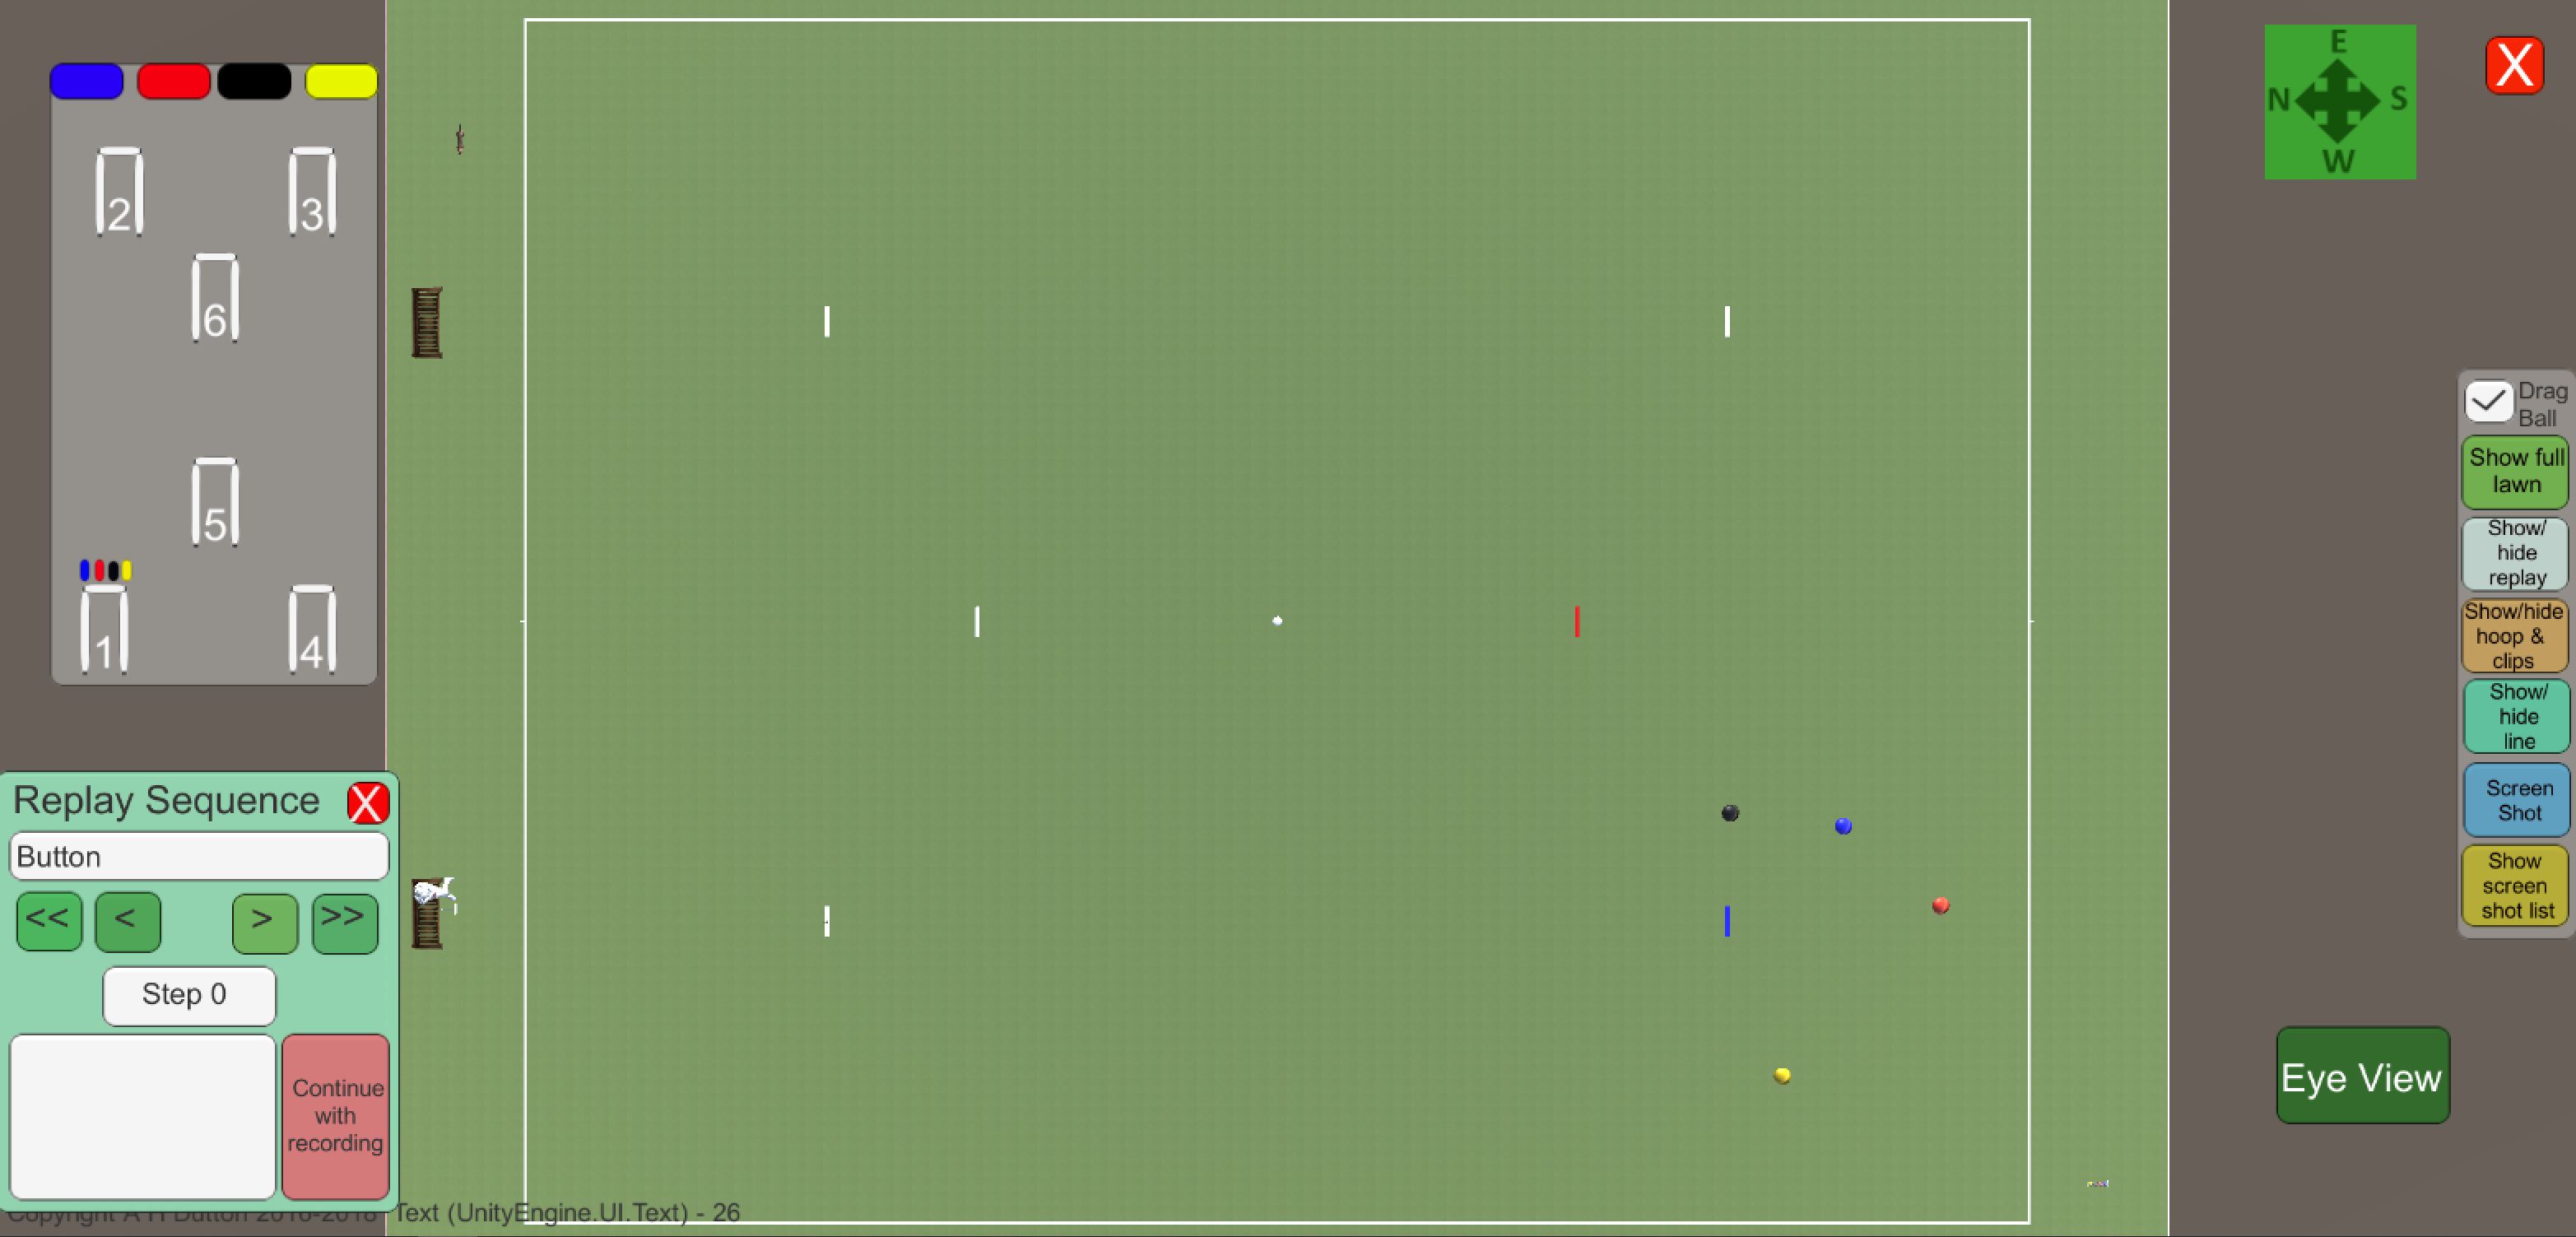
If a file is selected a panel will open to allow each shot to be played in turn. The shots can be viewed from eye level or the top level if the ‘Top View’ button is clicked.
The top view is to allow a better understanding of the ball positions. It is possible to zoom in and out using the mouse scroll wheel and drag the screen about. There are also helpful buttons on the right hand side.
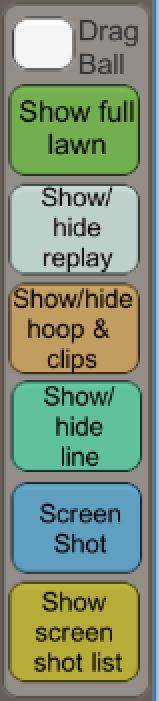
Drag Ball: If ticked then balls can be dragged by clicking on the holding the button down and dragging or they can be moved by clicking on them and then clicking on the desired position on the lawn. Note that if the mouse crosses any of the other buttons the tick is removed.
Show Full Lawn: The full lawn is shown if this button is clicked.
Show/Hide Replay: It is possible to replay recorded shot sequences in this view. This button hides the replay panel.
Show Hide/Hips and Hoops: On the left hand side there is a display of the hoops and clips. This will be discussed below. This button will hide the display.
Show hide line: This button will hide/show the roll line guides when doing a split shot.
Screen Shot: Clicking this button will take and save a screen shot. Successive screen shows will be numbered in sequence.
Show Screenshot List: licking this button will open a panel where the screen shots can be managed.
This facility has been added to allow players to retain a series of screen shots showing a sequence of ball positions in two dimensions together with information on hoops run.
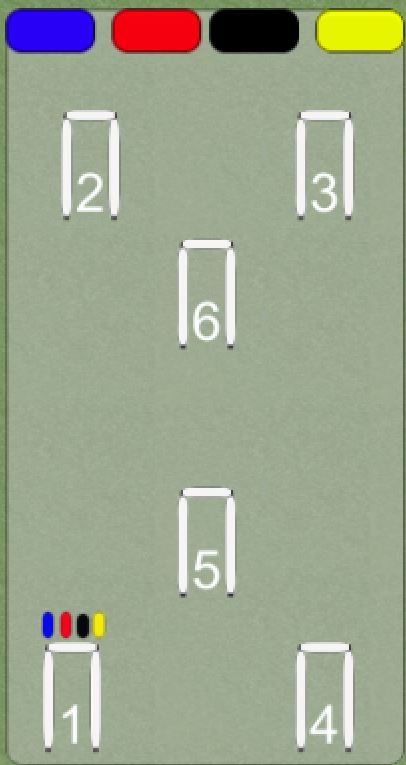
To show the clip positions, click on a ball colour at the top of the panel and then click at the top of the hoop or side of the hoop to position the clip for that ball on the top or side of the hoop respectively.
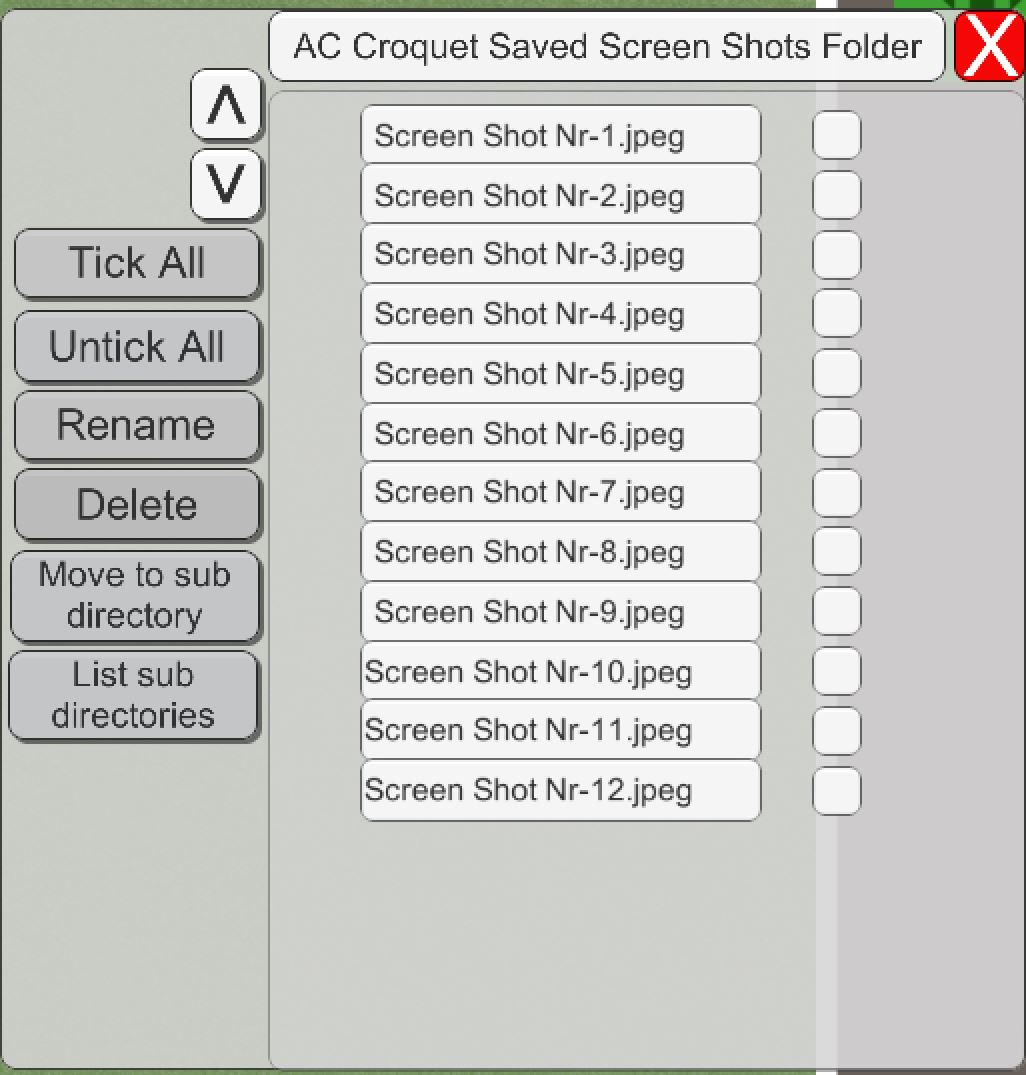
A series of screen shots can be taken. Once complete, the screen shot list can be opened displaying the list of screen shots. By hovering over the list, each screen shot will be displayed. The order can be changed, shots can be deleted new ones added and once complete they can be renumbered in sequence.
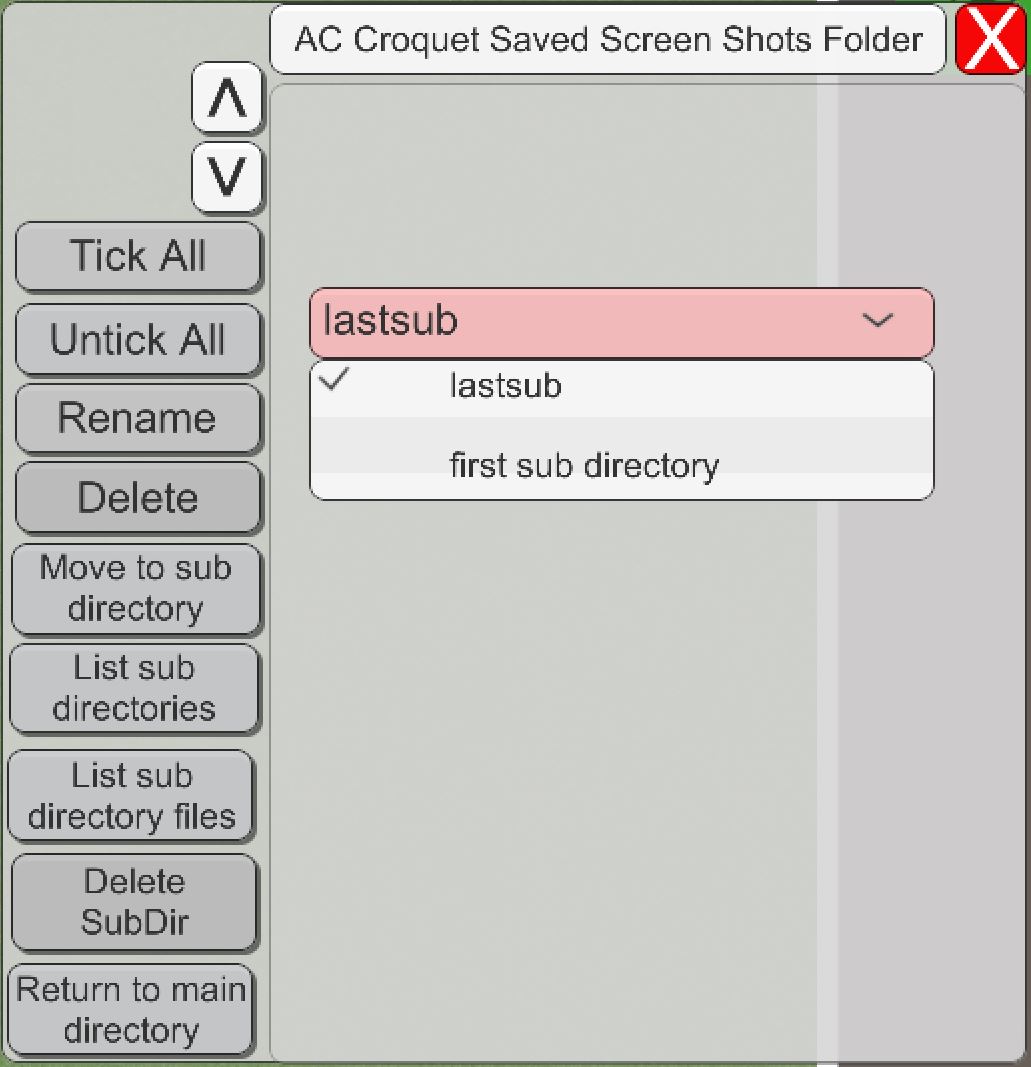
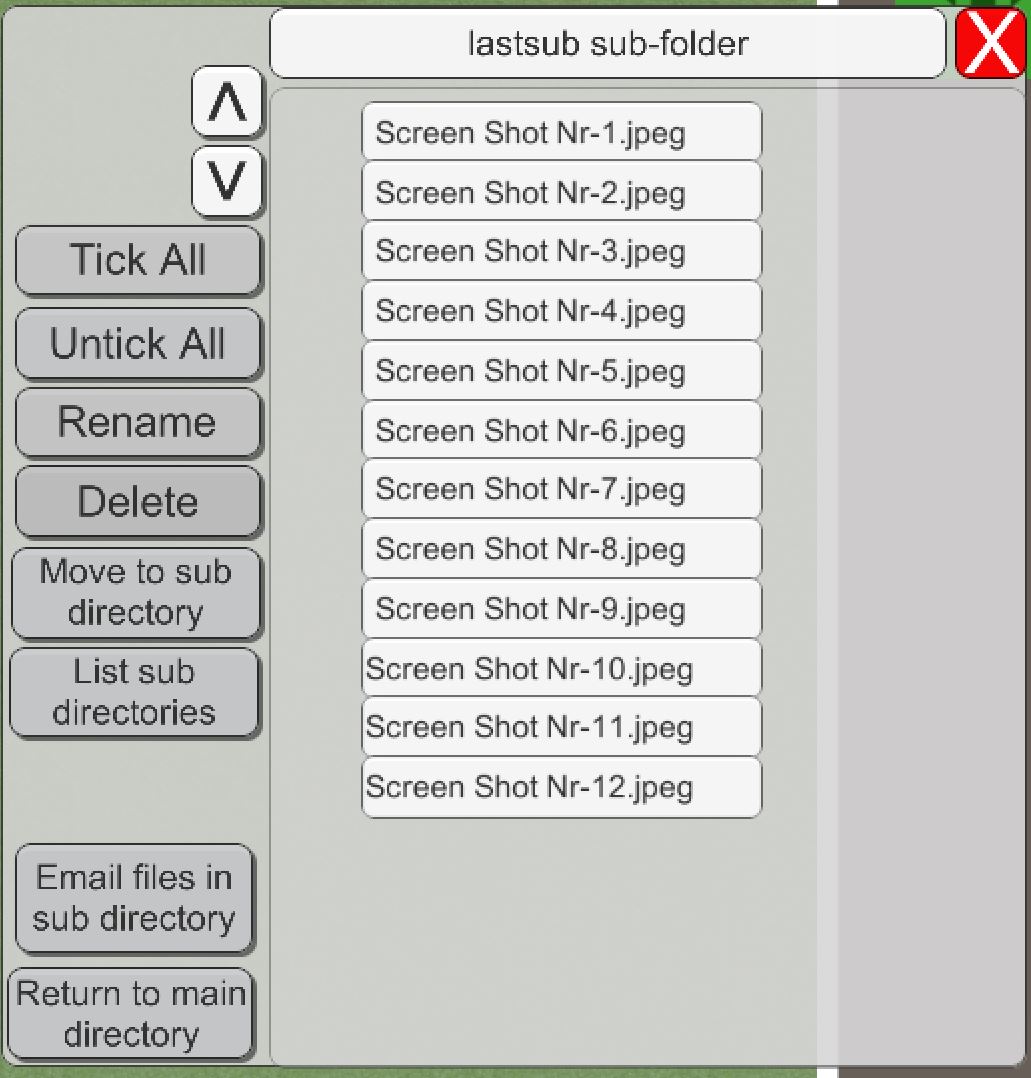
The set of screen shots can then be moved to a subdirectory which you name by clicking the 'Move to subdirectory' button. Once in the subdirectory they can be viewed by clicking the 'List subdirectory' button, selecting the subdirectory and then clicking the 'List subdirectory files' button. The contents of the subdirectory can then be emailed by clicking the 'Email files in subdirectory' button. Sub directories can also be deleted.
It has taken over two years and more than 30 thousand lines of code to develop this program. I would like to thank my wife, Stella, for her patience and support during this period and for allowing me to devote a considerable amount of my spare time to the programming.
I would also like to thank Mike Town ,Maggie and Michael Holland, Gill McDiarmid, Bernard Jones, Elizabeth McKenzie-Gray and Bill Woodrow, all players at Woking Lawn Tennis and Croquet Club for playing the game over many weeks to help me debug the program. Thanks also to Philip de Glanville for his tireless effort as a beta tester.
Author’s Background
I am a chartered consulting structural engineer by background but I have always enjoyed computer programming to automate and streamline office systems. This program started as an idea to have a plan of a croquet court on an pad where I could drag balls around with my finger to plan out sequences for triple peels etc. Three years later this is the result.
Andrew Dutton
March 2017 – Revised April 2018 - Revised March 2019